The most efficient and accurate method for piecing a square in a square involves some waste. With this method however, you will be able to easily and accurately make any size square in a square without resorting to a Square in a Square Calculator for the cutting measurements, either online or in some remote reference material. Follow along as I take you through the precision technique basics of piecing a square in a square.
Crunching the Numbers
This method uses a large center square and four small, corner squares. The large center square is cut ½” larger than the finished measurement of the unit. For example if you wanted a 4” finished unit, you would cut the center square 4½” (4 + ½ = 4 ½).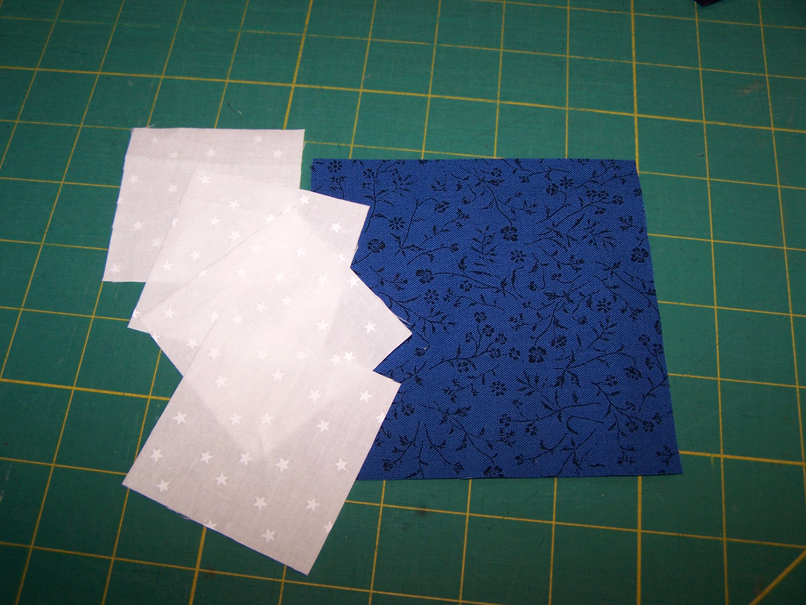 The
four smaller squares are cut ½” larger than half the finished
measurement of the unit. In the example, you would cut the smaller
corner squares 2½” (half of 4 is 2 + ½ =2 ½).
The
four smaller squares are cut ½” larger than half the finished
measurement of the unit. In the example, you would cut the smaller
corner squares 2½” (half of 4 is 2 + ½ =2 ½). Piecing it Together
 Step 1:
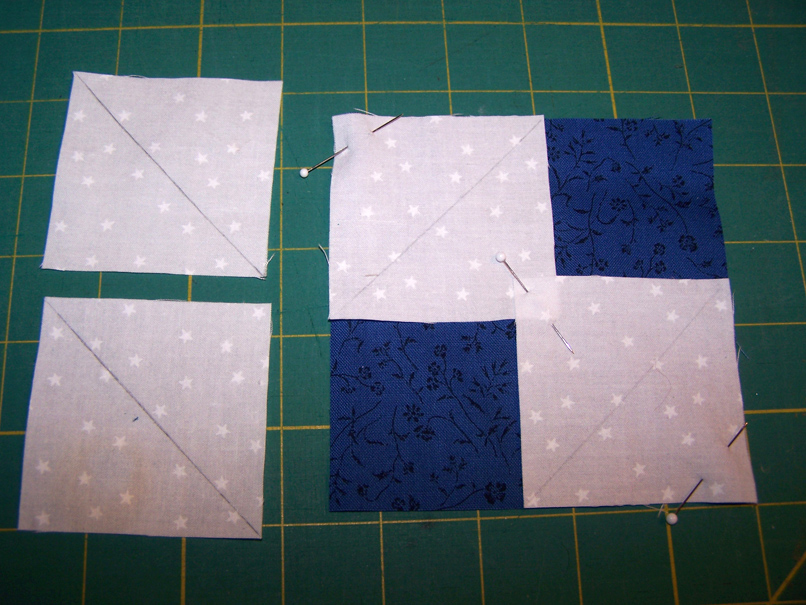
Draw a diagonal line on the wrong side of each of the four corner
squares. Position two corner squares on two opposite corners of the
large center square with the drawn lines running across the corner of
the large square. Stitch on the drawn line, not on each side as we have
been doing for previous units.
Step 1:
Draw a diagonal line on the wrong side of each of the four corner
squares. Position two corner squares on two opposite corners of the
large center square with the drawn lines running across the corner of
the large square. Stitch on the drawn line, not on each side as we have
been doing for previous units. 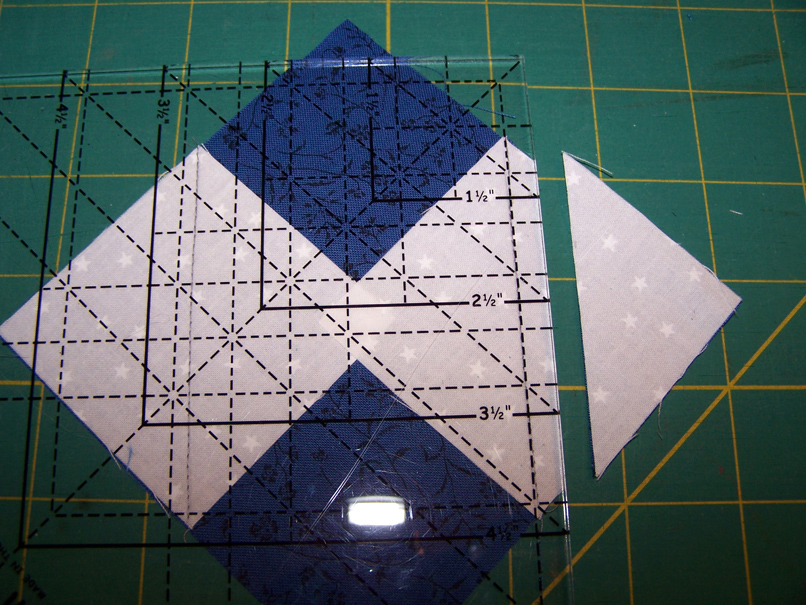 Step 2: Trim the corner ¼” from the stitching line.
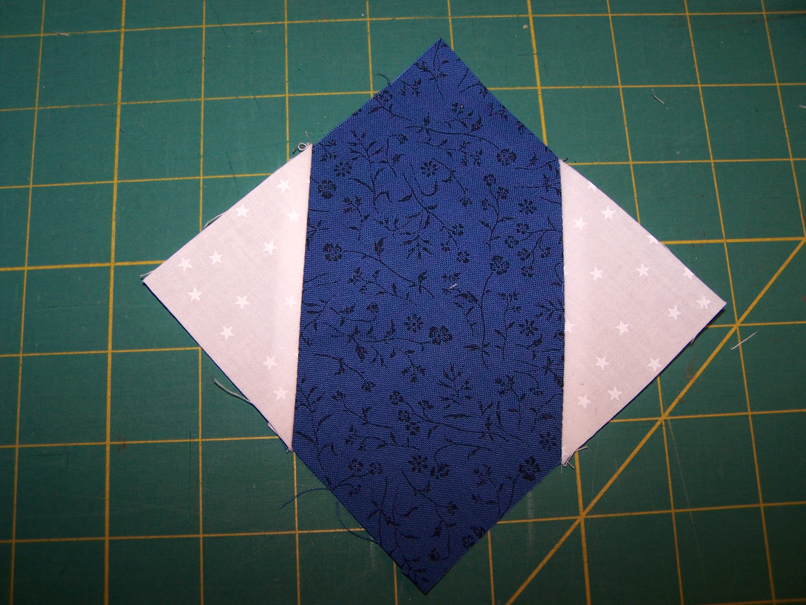 Step 3: Press the remaining corner triangle away from the center square.
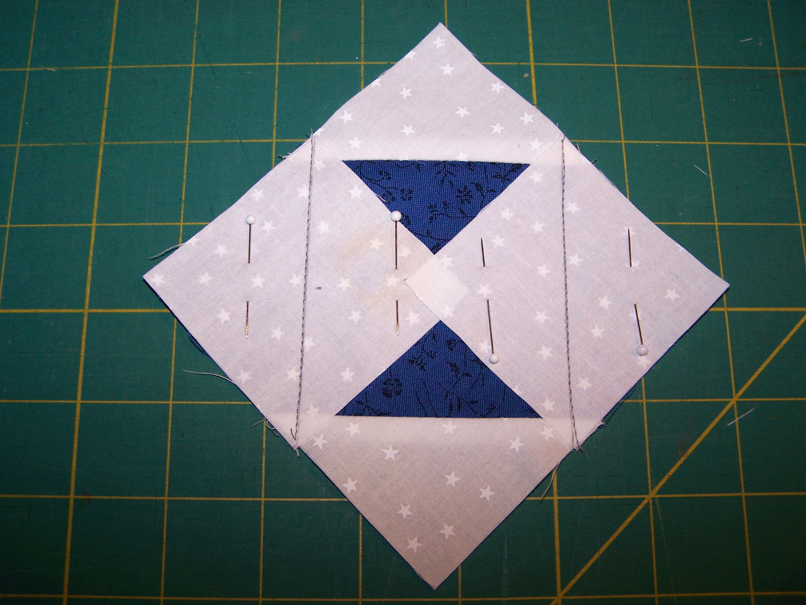 Step 4:
Position the other two corner squares on the open corners of the large
center square with the drawn lines running across the corner. Stitch on
the drawn line.
Step 4:
Position the other two corner squares on the open corners of the large
center square with the drawn lines running across the corner. Stitch on
the drawn line. 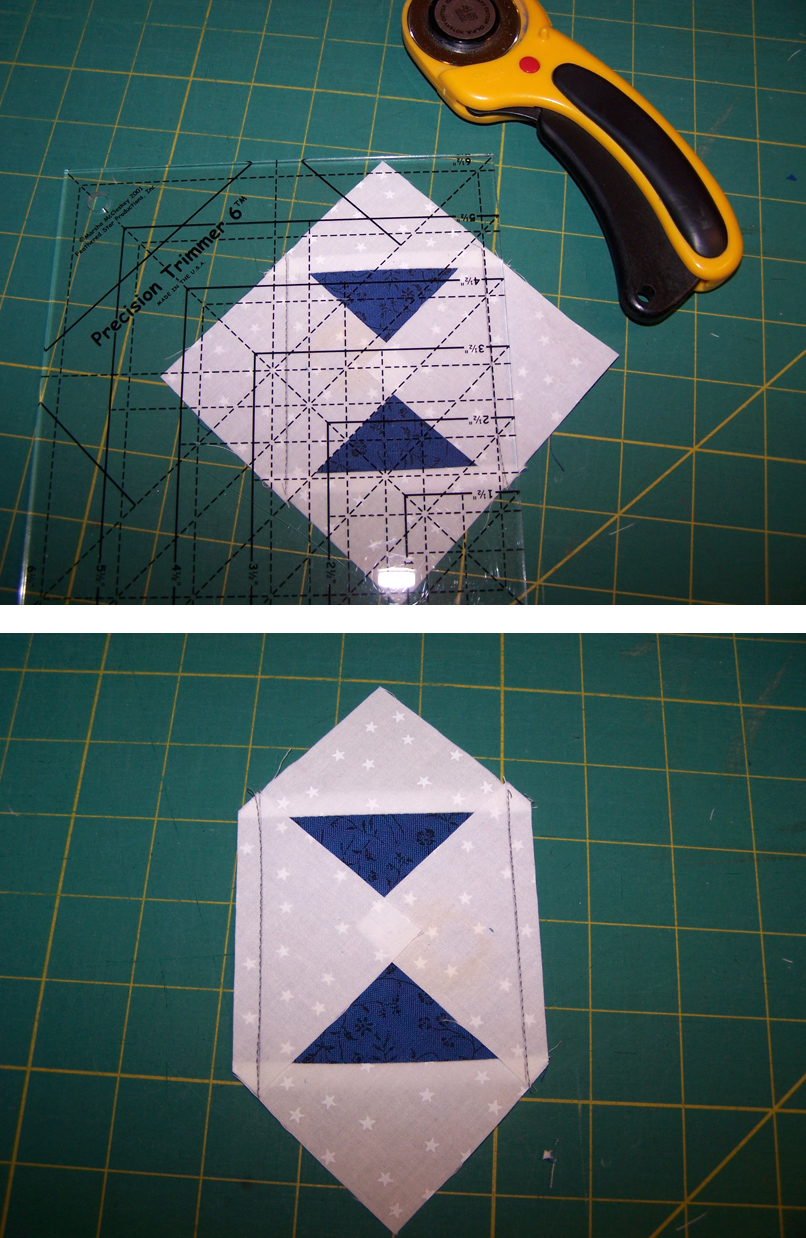 Step 5: Trim the corner ¼” from the stitching line.
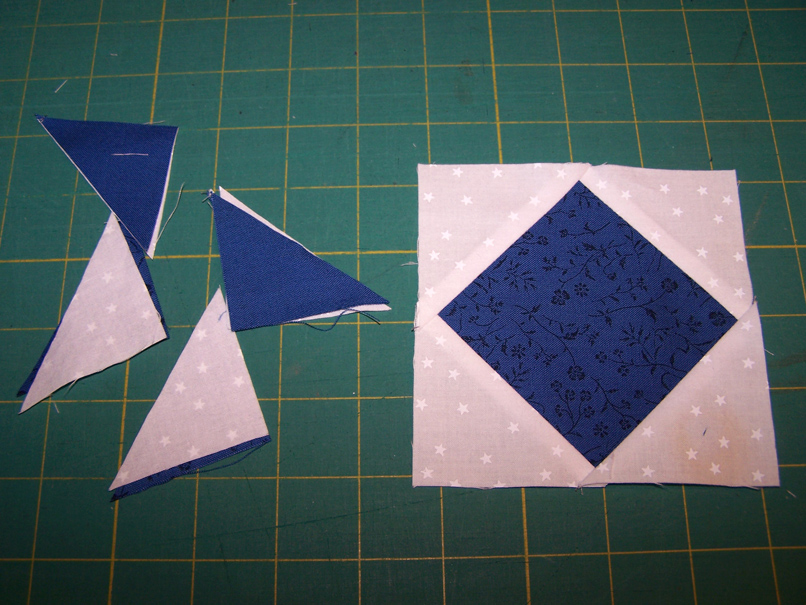 Step 6:
Press the remaining corner triangles away from the center square.
Although there is some waste, you will have an accurate square in a
square of any size you wish to make.
Step 6:
Press the remaining corner triangles away from the center square.
Although there is some waste, you will have an accurate square in a
square of any size you wish to make. Step 7: To add corner triangles to a square that does not need to be a specific size, you will first need to determine the unfinished size of the unit. To determine the unfinished size of the unit, multiply the square by 1.414. For example, the house square measures 5½”. Multiply this number by 1.414 to equal 7¾”. The unfinished size of the unit is 7¾”.
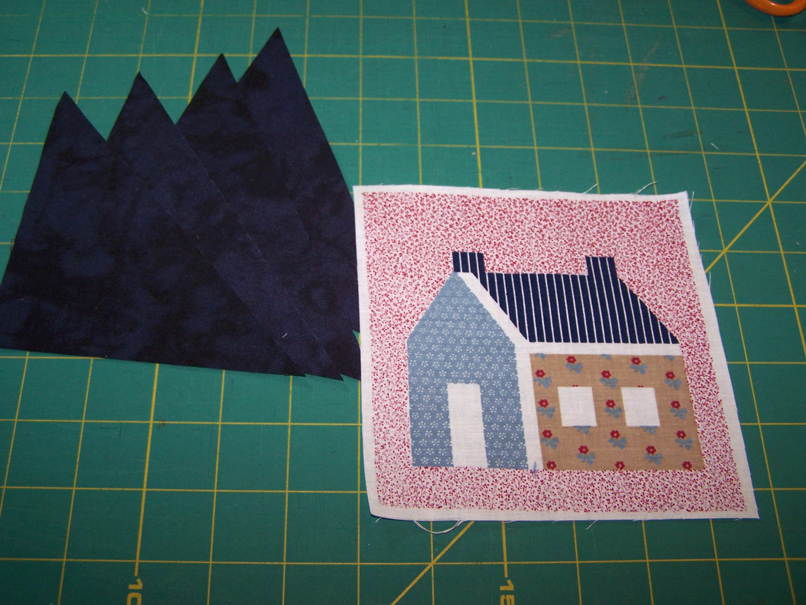 Step 8:
For the corner triangles, cut two squares half the size of the
unfinished unit plus 1”. For the house square, you would divide 7¾” by 2
and add 1” (7¾ divided by 2 = 3.875 + 1 = 4.875, round the number up to
5”). It is better to have them a little larger for trimming down to
size. After cutting the two corner squares, cut the squares in half for
the four corner triangles.
Step 8:
For the corner triangles, cut two squares half the size of the
unfinished unit plus 1”. For the house square, you would divide 7¾” by 2
and add 1” (7¾ divided by 2 = 3.875 + 1 = 4.875, round the number up to
5”). It is better to have them a little larger for trimming down to
size. After cutting the two corner squares, cut the squares in half for
the four corner triangles.  Step 9:
Center the bias edge of two triangles on opposite sides of the center
square, right sides together. I like to fold the center square and the
triangles in half and give them a little pinch to make a tiny crease for
centering the pieces. Stitch along the edge using a scant ¼”. Press the
triangles away from the center square.
Step 9:
Center the bias edge of two triangles on opposite sides of the center
square, right sides together. I like to fold the center square and the
triangles in half and give them a little pinch to make a tiny crease for
centering the pieces. Stitch along the edge using a scant ¼”. Press the
triangles away from the center square. Step 10:
Center the two remaining triangles on the open sides of the center
square. Stitch along the edge using a scant ¼”. Press the triangles away
from the center square.
Step 10:
Center the two remaining triangles on the open sides of the center
square. Stitch along the edge using a scant ¼”. Press the triangles away
from the center square.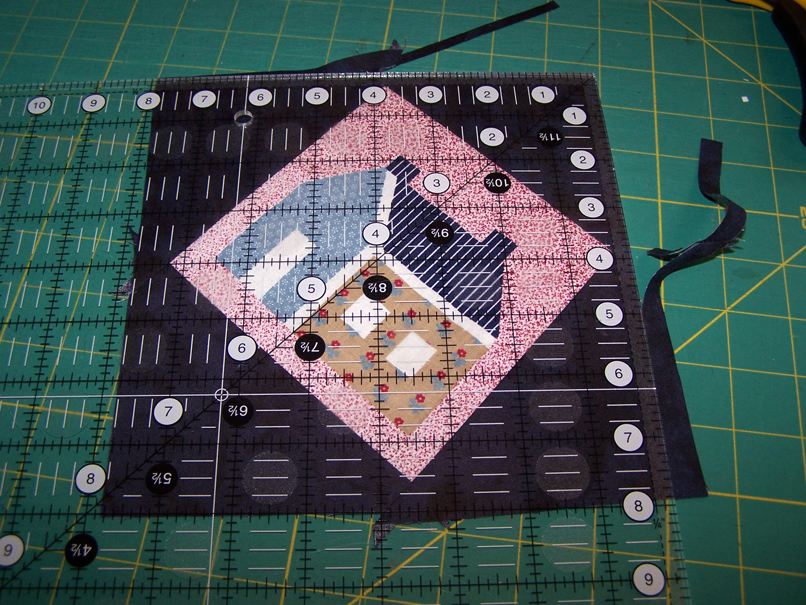 Step 11:
The square in a square is now ready for trimming. For larger units, use
the 12” square up ruler. Align the ¼” line on the ruler along two
points on the unit, checking for accurate alignment of the other two
points to make sure the unit is square. Trim two sides.
Step 11:
The square in a square is now ready for trimming. For larger units, use
the 12” square up ruler. Align the ¼” line on the ruler along two
points on the unit, checking for accurate alignment of the other two
points to make sure the unit is square. Trim two sides.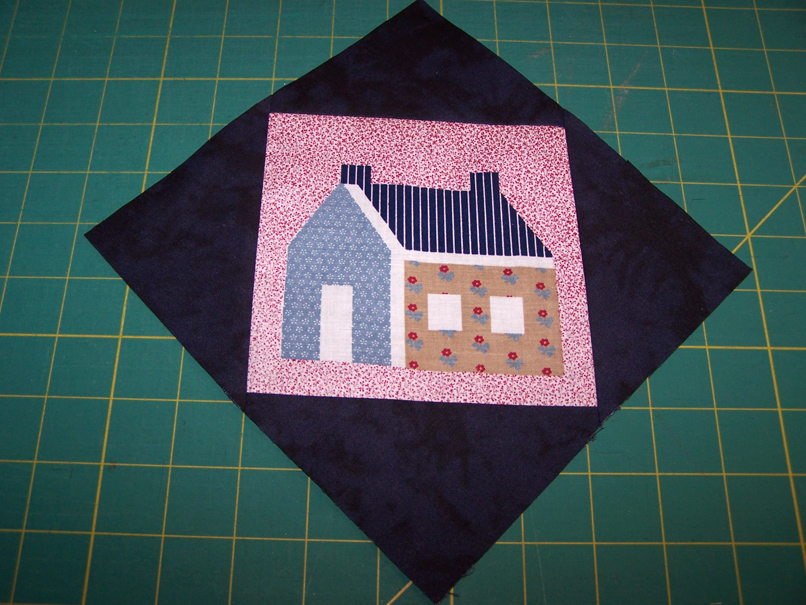 Step 12: Turn
the unit around and align the ¼” line on the ruler along the other two
points on the unit. Check to make sure the other edges are square. Trim
the remaining two sides to complete the project.
Step 12: Turn
the unit around and align the ¼” line on the ruler along the other two
points on the unit. Check to make sure the other edges are square. Trim
the remaining two sides to complete the project.